To get to your Preferences Settings, click the "gear icon" at the top right of the screen.
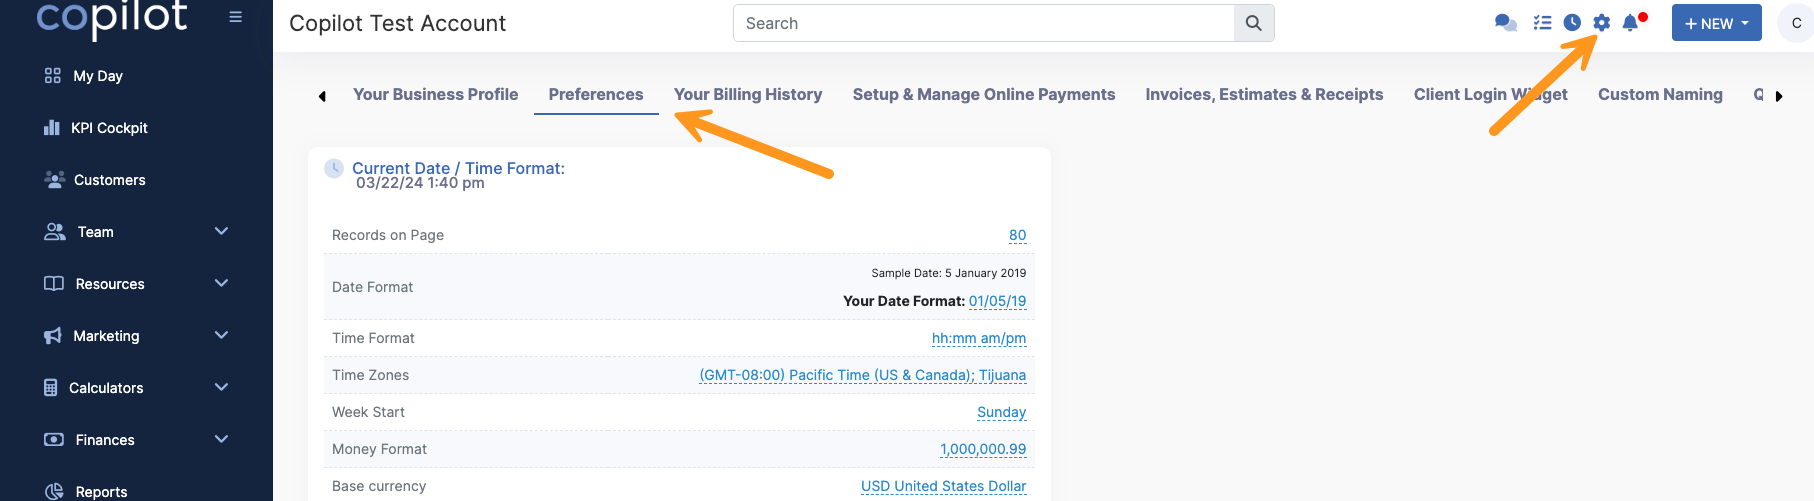
Here are the settings that are on the Preference page
- Records on Page - The number of results you want to appear on each page, such as invoices, customers, etc.
- Date Format - How you want the date to appear on invoices, estimates, and anywhere in the program.
- For example, Jun 1, 2013, or Jun 1, 13, etc.
- Time Format - How you want the time to appear anywhere in the program.
- (You can choose a 12-hour format or a 24-hour format).
- Time Zone - The time zone you are located in.
- Week Start - The day you want to start your work week.
- Money Format - How you want money formatted, such as $100.00 or $100,00.
- Base Currency - This is the currency format for your country.
- When Creating Invoices - This is how visits are grouped for invoicing purposes.
For example, "Create an Invoice That Puts All Visits for That Customer on the Invoice" puts all visits for a customer on one invoice, along with the date you were there and the services you performed. (This is how most people prefer to bill). - Invoice Start #- The starting # of invoices. You can have invoices start with any number you'd like, such as 00001 or 10000.
- Estimate Start #- The starting # of estimates. You can have estimates start with any number you'd like, such as 00001 or 10000...
- Customer Start #- The starting # of your customers. Customers can start with any number you'd like, such as 00001 or 10000...
- Show Property Name on Invoice Under the Items and Services Performed At The Property - Choose to show the name and address or only the address of properties on invoices. This will be displayed under the list of items and services performed at the property.
- Customer List View Mode - This will show the customer's name or name and address on the customer list.
- Show Account Standing - This will show customer account info for all time or the current year.
- Automations Text Message Times - Set the times you do not want your texts being sent via automation to be sent before or after.
- Push Notifications - Select which push notifications you would like to receive.
Automations Text Times
Here you can set time frames for when automated texts should and should not go out.
Push Notifications
Here you can enable and disable push notifications for certain things in Copilot
NOTE: Only the "Owner" account can receive push notifications at the time of writing this. The "Owner" account is the account that was used to sign up for Copilot.
Maps and Routes
Here you can check the checkbox to set your business location as the routes' start and ending location.
You can leave this unchecked and set your start and end locations.
Scheduler
You can check this box to move all related, open recurring events when you move a single recurring event.
There is also a setting to which days the scheduler can put your visits.
You can allow it to be scheduled every day of the week, every day but Saturdays, every day but Sunday, or every day but Saturday and Sunday.
Properties
Here you can set your default property "Type".
Custom Fields
Here you can enable or disable the option to "Show Custom Fields in Client Portal and PDF". This is relevant for Invoices and Estimates that are sent out.
Call Automation Notifications
Here is where you can set which Employee/Owner get's notified when Call Notes are added to a customer profile, and exactly how that Employee/Owner is notified.
Advanced Features
Here you can enable and disable the Price Matrices & Job Costing feature.
Sequence Automations
Here you can choose to password protect your sequence automations, making them uneditable without the right password.