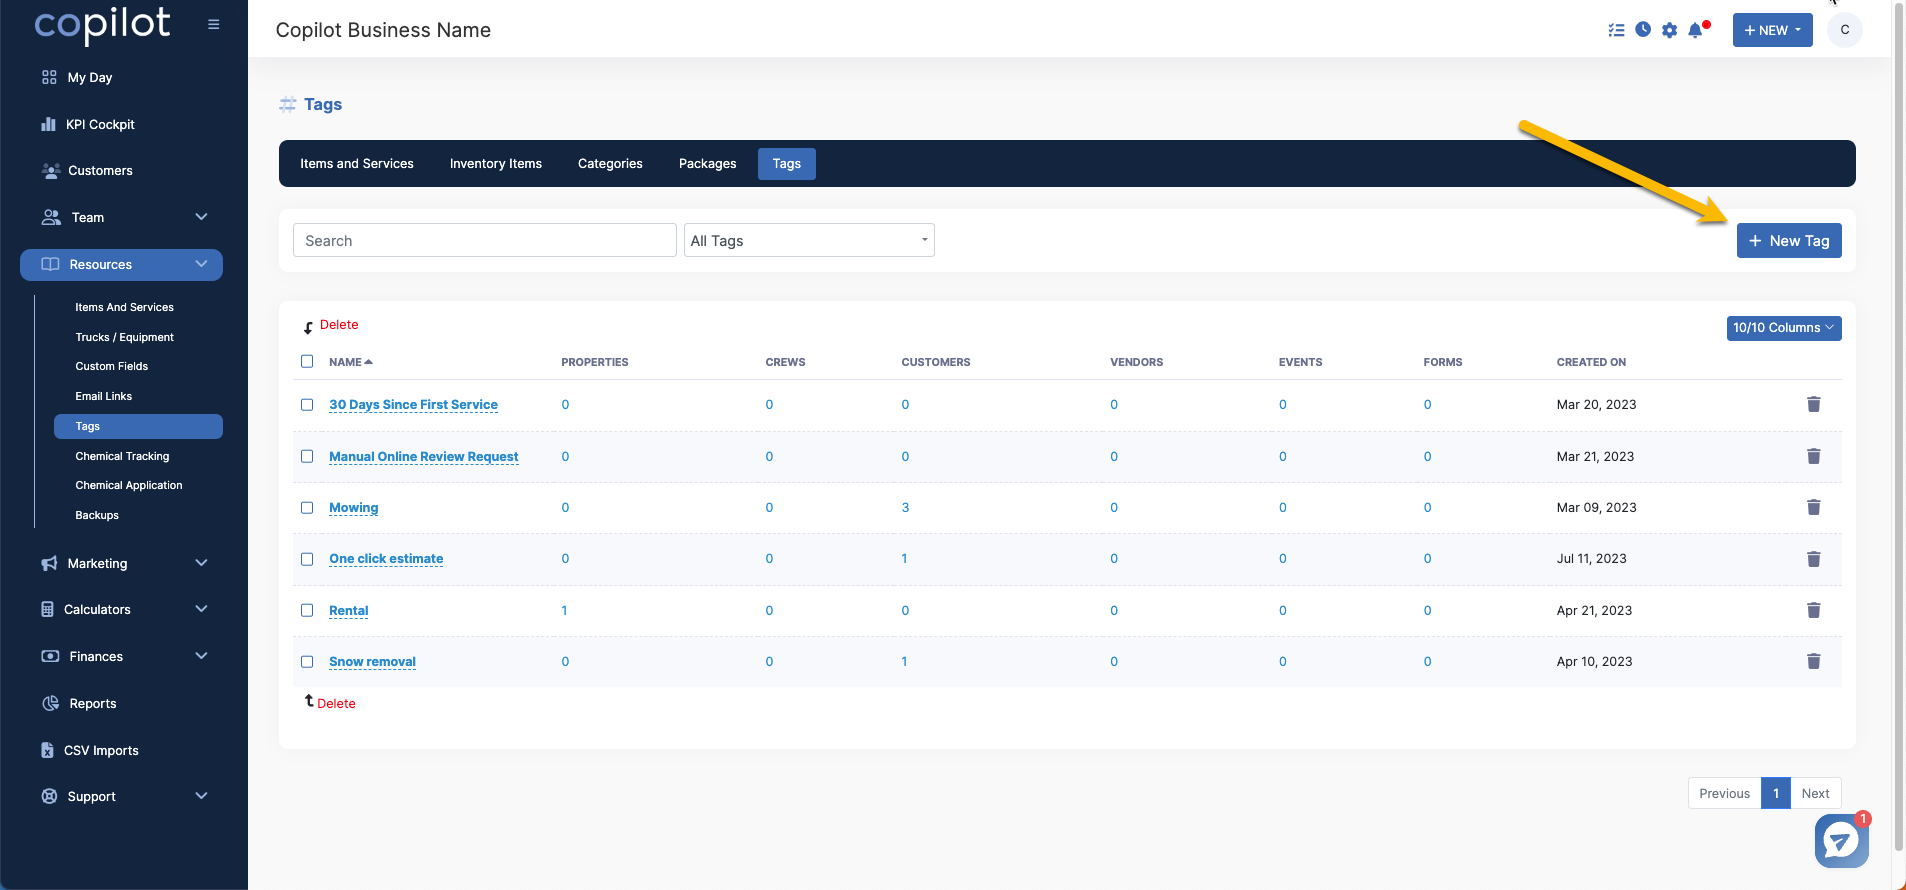
Step 1: Start by creating a tag for your email link. For today's example we will be creating a one click estimate tag and email link.

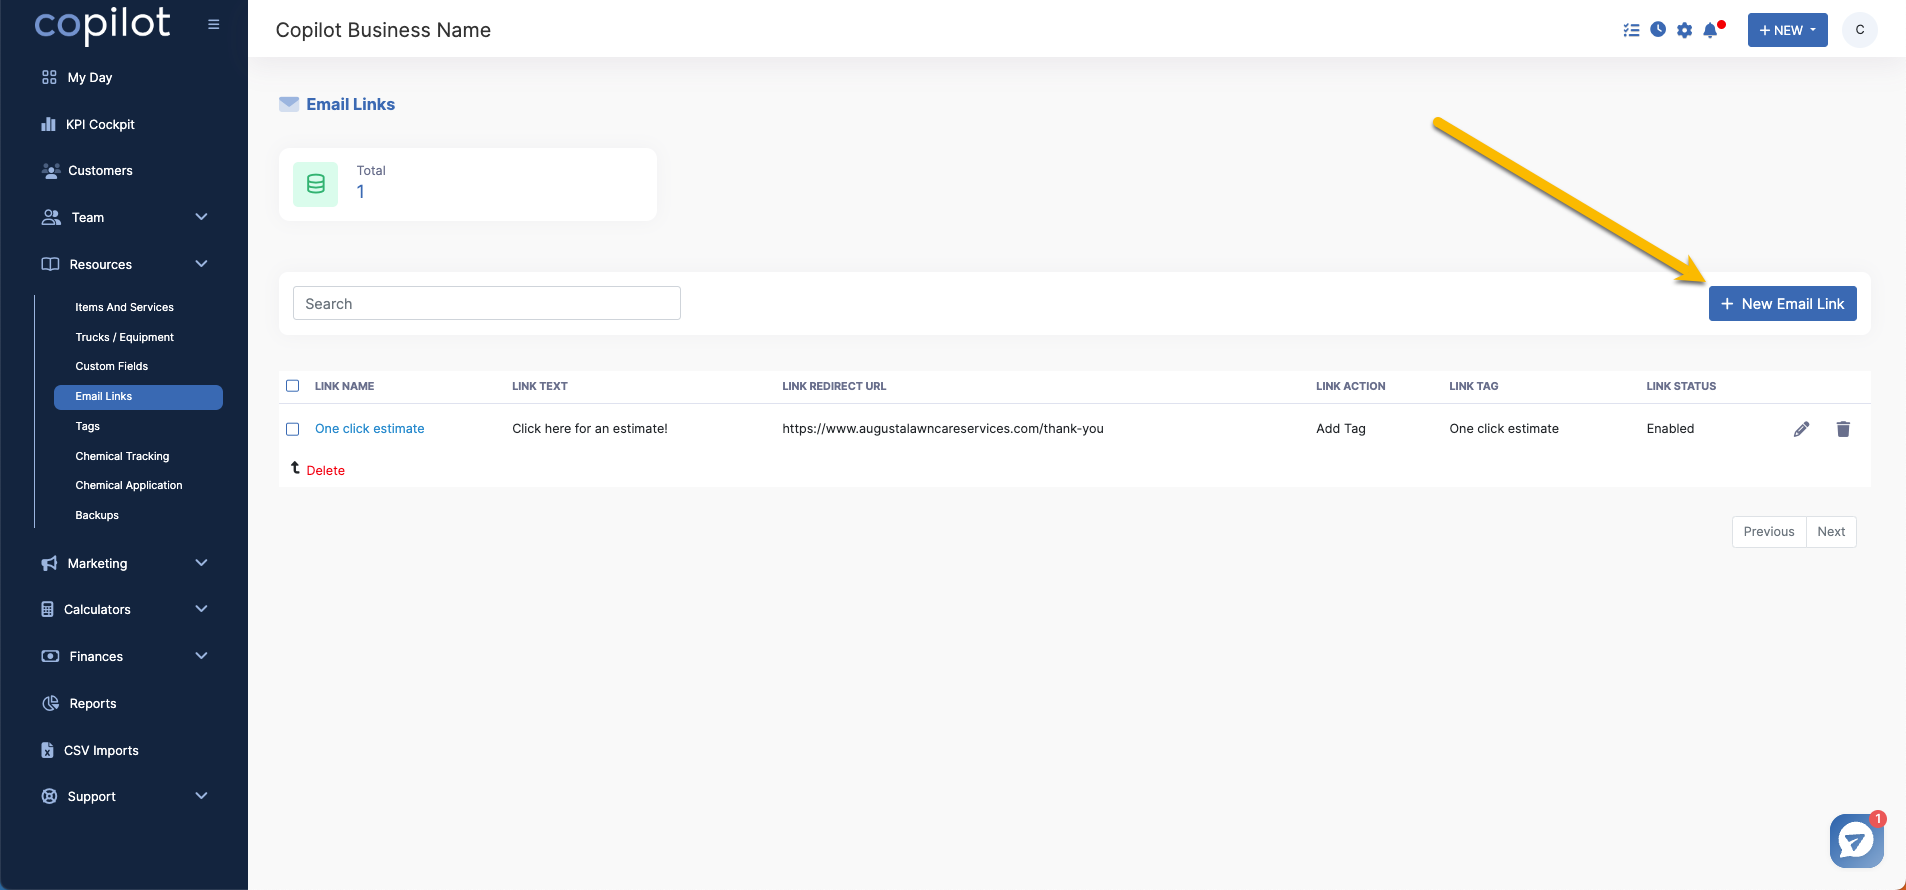
After your tag is created, use the left hand menu to find the "Resources>Email links" page to create your email link using the "+ New Email Link".

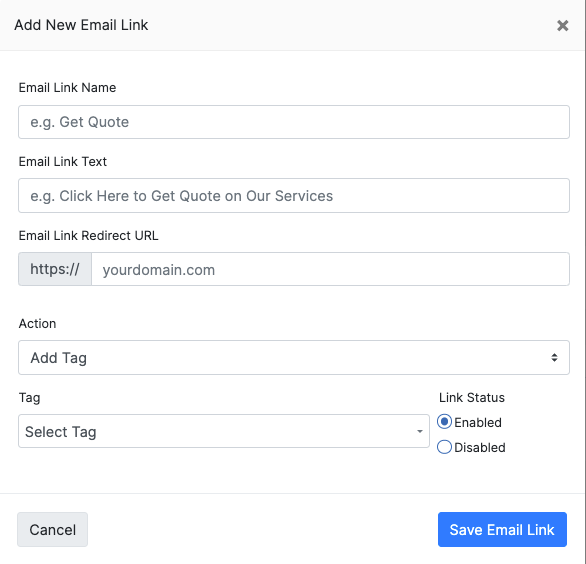
A pop up will appear to have you fill out key fields to finish your email link.

The Email link name will help you describe it's action or purpose.
The Email link txt is the txt that will be visible to the customer in the email.
The Email link/redirect URL is the page that pulls up when a customer clicks on the link.
The Action is tagging a customer, Then under Tag select the tag you created for this email link.
Once these fields are filled out, be sure to Enable your link.
Step 2: We will need to make sure an automation is running to make this happen! Go to "Marketing>Automations" to create one.
For our example today, we will create a one click estimate automation.
Trigger: When a tag is added
Tags type: Used with customers or all tags
Tags: One click estimate
Run time: Instantly
Action: Email or txt company owner
Email Template: Choose whichever email template you want the owner to receive. (customize the content of the template with the intentions behind the email link)
Step 3: Let's send out the email! "Marketing>Email"
Select the customers you'd like to send the email out to, attach your desired template and add a subject to your email.
Click into the txt block on your email that you'd like to attach your email link into.
Then click "Merge tags" on your tool bar. Scroll until you see your email link you'd like to attach to the txt block.
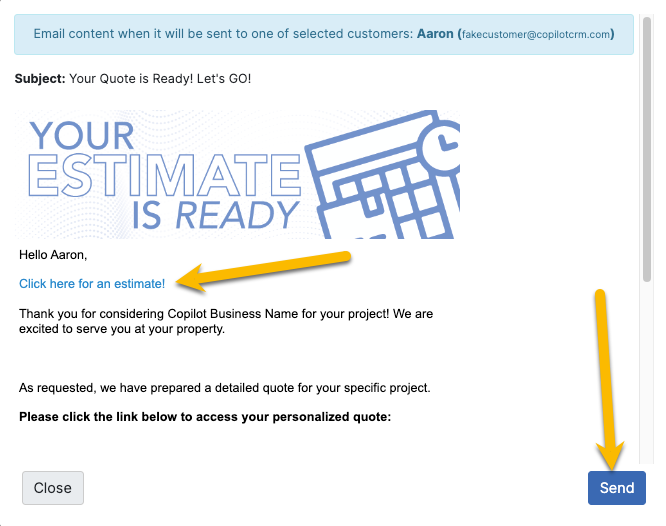
Once you're done, select "Preview and send" where you'll be able to see your live link before sending out!

Upon the customer opting in our out, the system will then tag that customer in their profile for you and email/txt the company owner to make any further actions.
You can also use email links to remove tags on customers. See Copilot University video for more info.