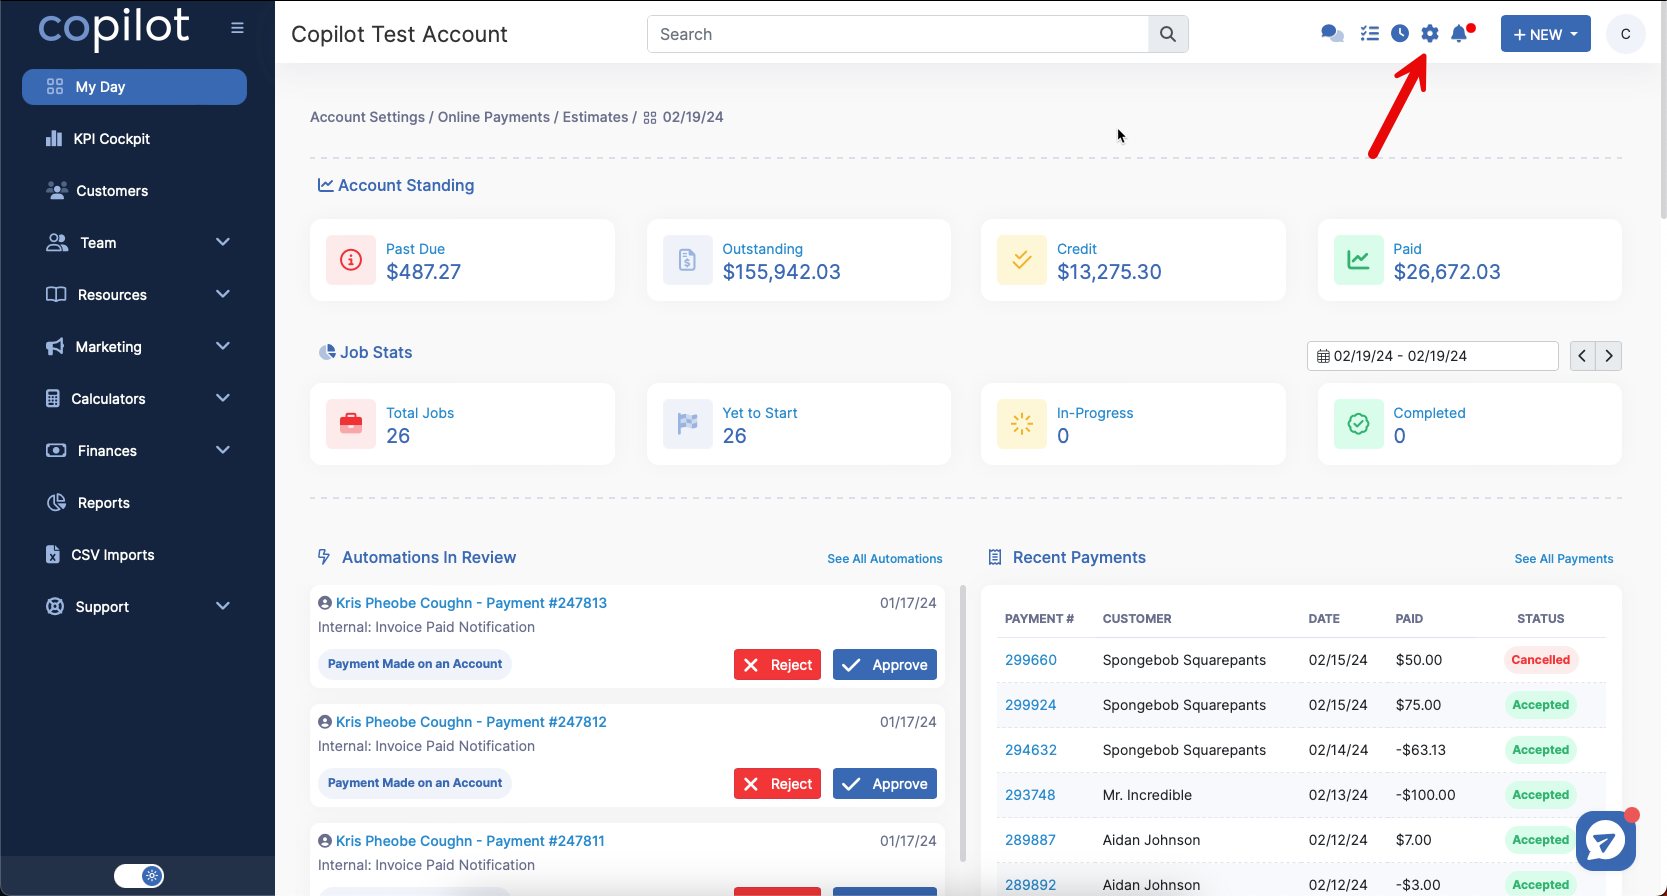
Click the gear icon in the top right corner.
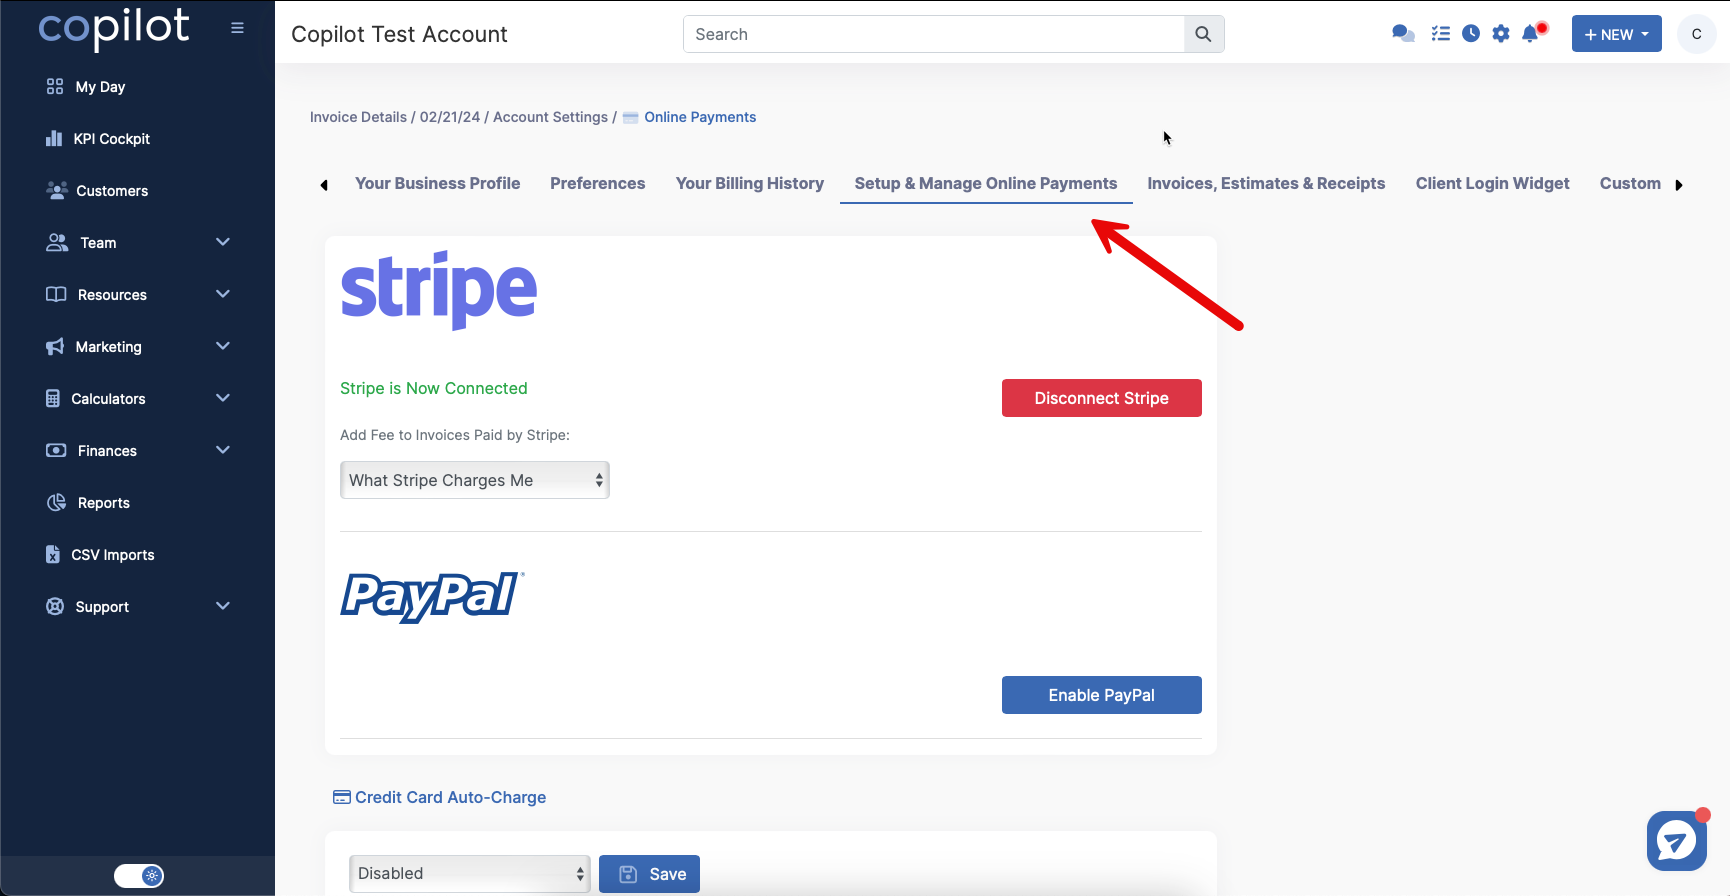
Next, select Setup & Manage Online Payments.
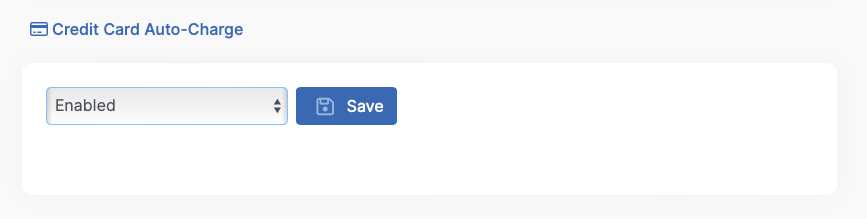
First, verify that the Credit Card Auto-Charge section is Enabled. Be sure to click Save if you changed this setting.
Next, scroll down to the Auto-Charge Settings section.
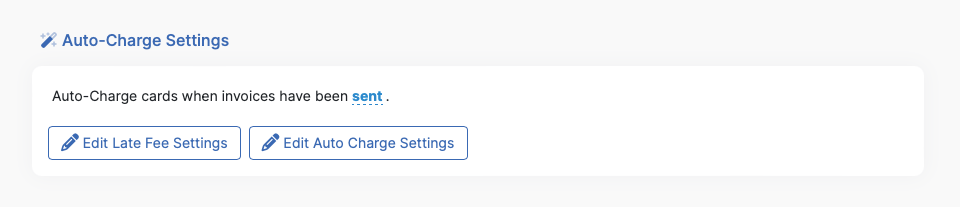
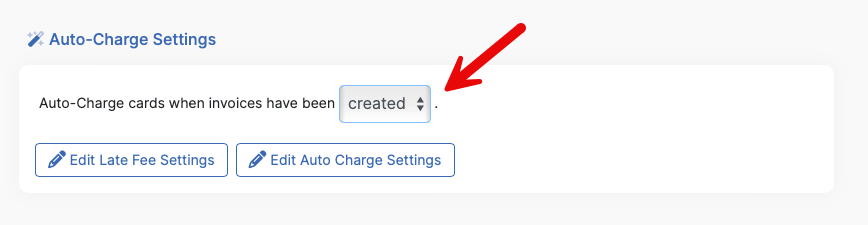
If you would like the customer to be charged once the invoice has been sent, make sure it looks like the above. If you want the customer to be charged when the invoice is created, click on the word sent, then select created from the options instead.
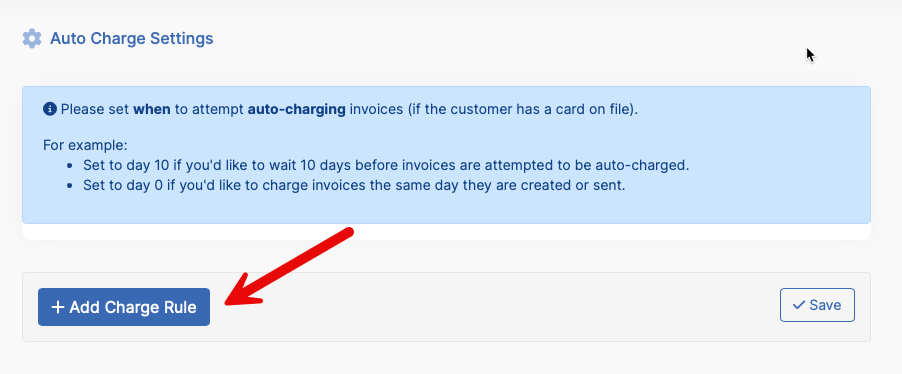
If you would like the customer to be charged 3 days after the invoice has been created, for example, you need to create a Charge Rule.
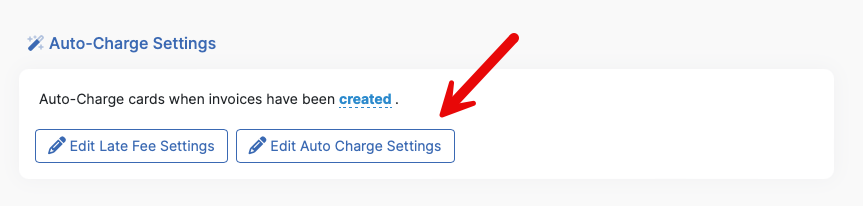
Select the Edit Auto Charge Settings button.
Then, click on + Add Charge Rule.
Type in 3 (or however many days you want to wait) and then click the Save button.
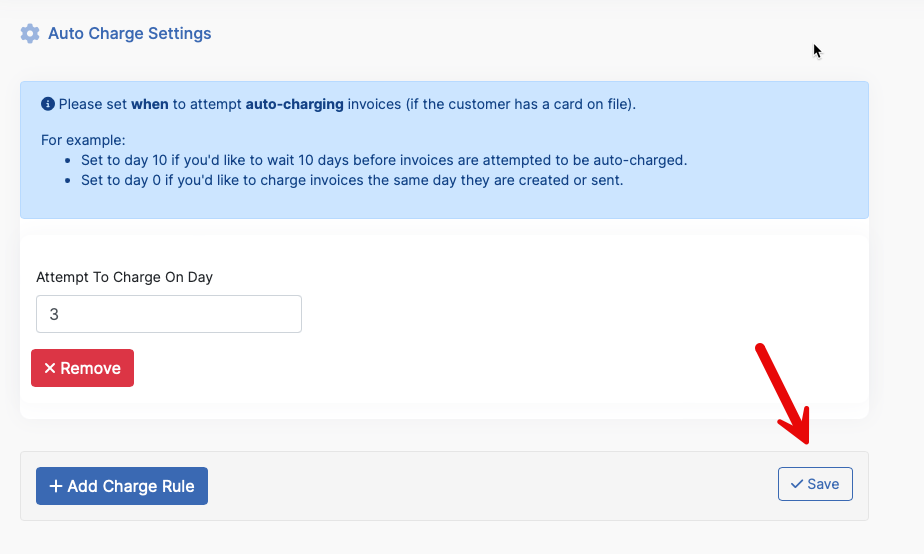
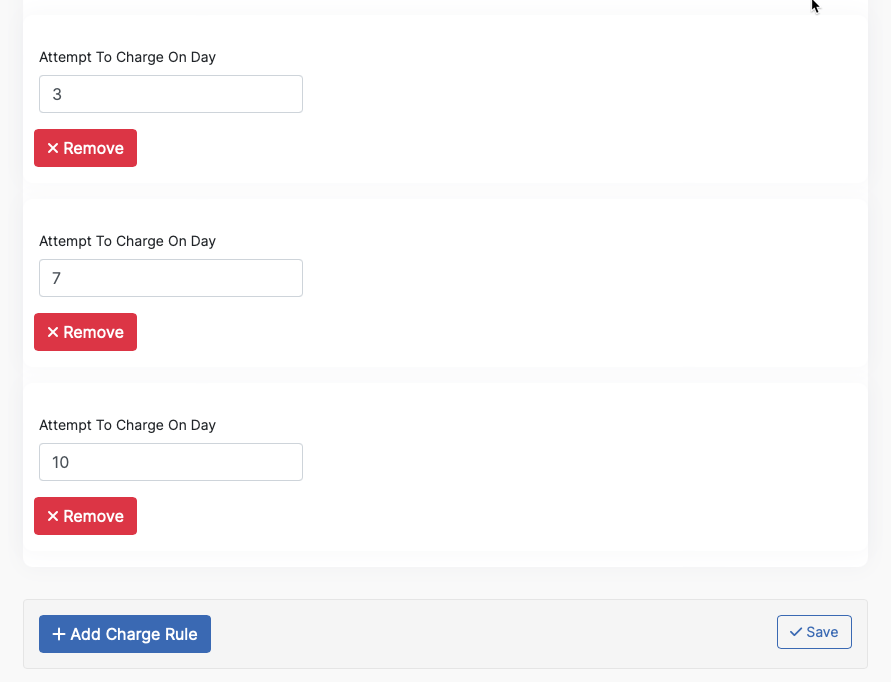
You can add multiple rules, or multiple attempts to charge a card on file as pictured below. Just be sure to hit Save if you add any additional days.
If you would like to charge the card 3 days after the invoice has sent, make sure the Auto-Charge Settings is set to sent, and then add any Charge Rules you would like applied as shown above.